Sharing is caring!
Tiramisu Cheesecake
Why You’ll Love Tiramisu Cheesecake?
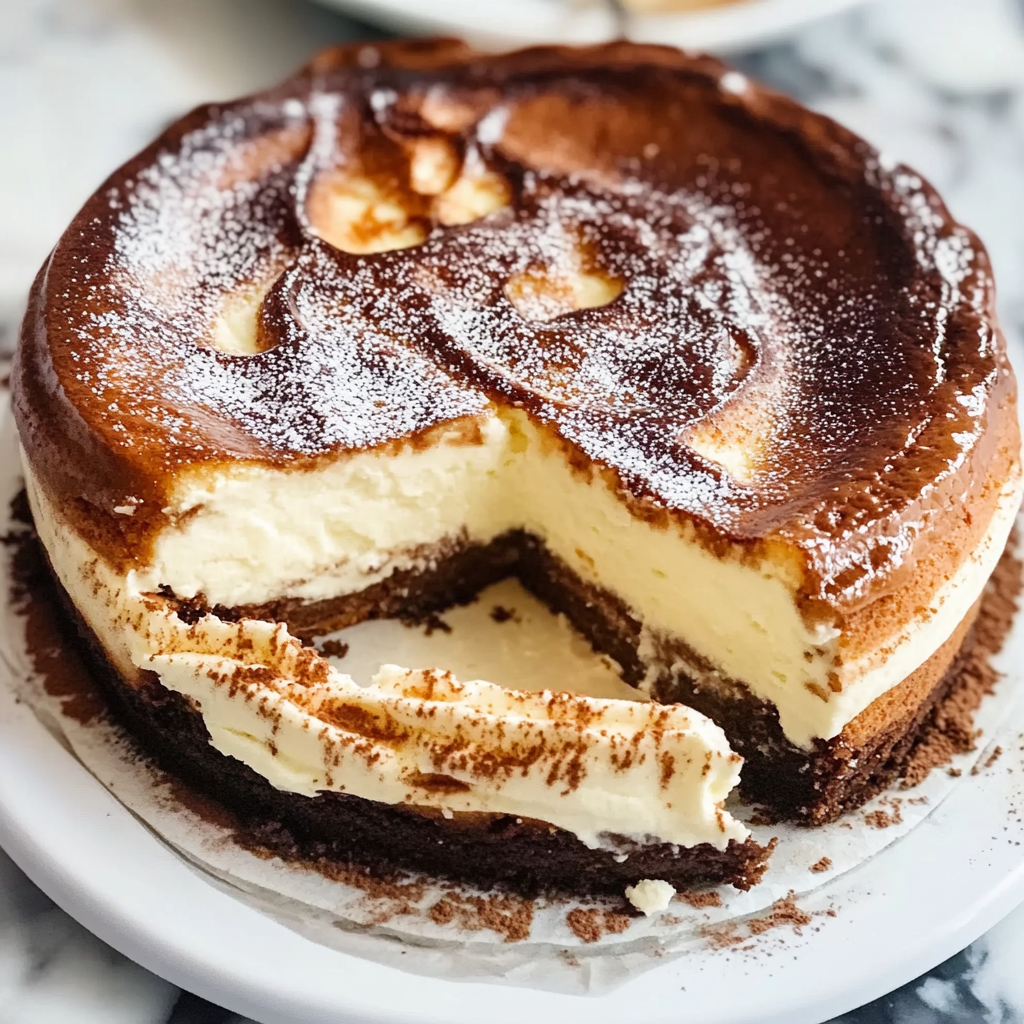
Tiramisu cheesecake is the ultimate dessert for anyone who adores the rich flavors of classic tiramisu combined with the creamy indulgence of cheesecake. This no-bake treat is perfect for special occasions, dinner parties, or simply satisfying your sweet tooth. With layers of coffee-soaked ladyfingers, velvety mascarpone filling, and a dusting of cocoa, it’s a dessert that impresses effortlessly. Plus, it’s easier to make than you might think—no oven required! If you love decadent desserts, you’ll adore this creamy cake recipe twist on a beloved classic.
Table of Contents
- Ingredients to make tiramisu cheesecake
- Time needed to make tiramisu cheesecake
- Quick Steps to Make Tiramisu Cheesecake
- Is tiramisu cheesecake healthy and nutritious
- Can I make tiramisu cheesecake healthier and still delicious
- How to Serve Tiramisu Cheesecake
- Avoid These Mistakes
- The best way to store leftover tiramisu cheesecake
- Ready to give tiramisu cheesecake a try
- Frequently Asked Questions
Ingredients to make tiramisu cheesecake
- 1 ½ cups graham cracker crumbs
- ⅓ cup melted butter
- 2 tablespoons granulated sugar
- 16 oz cream cheese, softened
- ¾ cup powdered sugar
- 1 teaspoon vanilla extract
- 1 cup heavy whipping cream
- 1 cup strong brewed coffee, cooled
- 2 tablespoons coffee liqueur (optional)
- 24 ladyfinger cookies
- 2 tablespoons unsweetened cocoa powder
- ½ cup mascarpone cheese
Time needed to make tiramisu cheesecake
This no-bake tiramisu cheesecake comes together in just 30 minutes of active prep time, plus 4 hours of chilling for the perfect creamy texture. Here’s the breakdown:
- Prep Time: 30 minutes
- Chill Time: 4 hours (or overnight)
- Total Time: 4 hours 30 minutes
For a quicker set, freeze for 2 hours instead—just ensure it’s firm before slicing. If you love effortless desserts, try our Greek yogurt cake for another fuss-free treat.
Quick Steps to Make Tiramisu Cheesecake
Step 1: Prepare the Crust
Crush ladyfinger cookies into fine crumbs and mix them with melted butter. Press the mixture firmly into the bottom of a springform pan to create a solid base for your tiramisu cheesecake.
Step 2: Make the Cheesecake Filling
Beat cream cheese, sugar, and vanilla until smooth. Fold in whipped cream gently to keep the mixture light and airy—just like a classic tiramisu.
Step 3: Layer with Coffee Soaked Ladyfingers
Dip ladyfingers in espresso (or strong coffee) and arrange them over the crust. Spread half the cheesecake filling on top, then repeat with another layer of coffee-dipped ladyfingers and filling.
Step 4: Chill to Perfection
Refrigerate your tiramisu cheesecake for at least 4 hours, preferably overnight, to let the flavors meld and the texture set.
Step 5: Dust with Cocoa
Before serving, dust the top with cocoa powder for that signature tiramisu finish. Slice and enjoy!
Is tiramisu cheesecake healthy and nutritious ?
Tiramisu cheesecake combines the rich flavors of coffee, mascarpone, and cocoa, but it’s not the most nutrient-dense dessert. A typical slice contains around 350-450 calories, with high amounts of sugar (25-35g) and saturated fat (15-20g). However, it does provide small amounts of calcium and protein from the cheese and eggs. For a lighter version, consider using Greek yogurt as a partial substitute for mascarpone or reducing the sugar content.
If you’re looking for healthier dessert alternatives, check out this whipped cream crepe recipe or this pomegranate shortbread for a lower-calorie option. For more balanced meal ideas, explore our vegetarian Italian soup or this vegan split pea soup to balance indulgence with nutrition.
Can I make tiramisu cheesecake healthier and still delicious?
Absolutely! You can enjoy a lighter version of tiramisu cheesecake without sacrificing flavor. Here are some smart swaps to make this dessert healthier while keeping it irresistibly tasty.
Healthier Ingredient Alternatives:
- Greek yogurt instead of cream cheese for a protein boost and lower fat content. Try our Greek yogurt cake recipe for inspiration on using yogurt in desserts.
- Whole grain ladyfingers or homemade almond flour biscuits for added fiber.
- Dark chocolate (70% cocoa or higher) for richer flavor and antioxidants.
- Natural sweeteners like honey or maple syrup instead of refined sugar.
For more healthy dessert ideas, check out these lightened-up crepe recipes that use similar techniques.
Portion Control Tips:
- Make mini cheesecakes in muffin tins for built-in portion control.
- Serve with fresh berries to add volume and nutrients without extra calories.
- Use espresso powder instead of alcohol for the coffee flavor.
If you’re looking for other delicious but healthier dessert options, our creamy cake recipe uses some of these same principles. You might also enjoy these pumpkin cream cheese cookies as another lighter dessert alternative.
Remember, the key to healthier desserts is balance – you can still enjoy the rich flavors of tiramisu cheesecake while making smart ingredient choices!
How to Serve Tiramisu Cheesecake?
This decadent tiramisu cheesecake deserves a show-stopping presentation. Serve chilled slices on elegant dessert plates, garnished with a dusting of cocoa powder or grated dark chocolate. For a café-style touch, add a dollop of mascarpone whipped cream and a few espresso beans. Pair it with a shot of hot espresso or a glass of spiced dessert wine for an indulgent finish.
For a brunch twist, pair it with lighter fare like our Greek yogurt cake or fresh berries. If you’re hosting a dinner party, balance the richness with a crisp Italian-inspired soup as a starter. Leftovers? Store slices airtight—they taste even better the next day!
Avoid These Mistakes
Making a tiramisu cheesecake is simple, but a few common errors can affect texture and flavor. Here’s what to watch out for:
1. Overmixing the Batter
Overmixing can incorporate too much air, leading to cracks. Mix just until smooth—like with this creamy cake recipe—for a dense, velvety texture.
2. Skipping the Coffee Soak
Ladyfingers need a quick dip in coffee for moisture. Too little, and they’ll be dry; too much, and they’ll turn soggy. For balance, check techniques in this mascarpone dessert guide.
3. Using Cold Ingredients
Cold cream cheese or mascarpone creates lumps. Bring them to room temperature first, as recommended in this Greek yogurt cake tutorial.
4. Rushing the Chill Time
Setting takes at least 4 hours. Cutting too soon? You’ll get a messy slice. For no-bake success, follow timing tips from this chilled dessert resource.
The best way to store leftover tiramisu cheesecake
To keep your tiramisu cheesecake fresh, store it in an airtight container in the refrigerator for up to 5 days. For longer storage, wrap individual slices tightly in plastic wrap and freeze for up to 3 months. Thaw overnight in the fridge before serving. If you love creamy desserts, try our creamy cake recipe for another indulgent treat. For more freezing tips, check out this guide on preserving desserts.
To prevent sogginess, place a paper towel under the cheesecake in the container to absorb excess moisture. For reheating (if desired), let slices sit at room temperature for 15 minutes or warm gently in the microwave at 50% power. Pair leftovers with our pomegranate shortbread for a delightful contrast. Learn more about dessert storage from this expert baking resource.
Ready to give tiramisu cheesecake a try?
This irresistible fusion dessert combines the best of both worlds—creamy cheesecake and classic tiramisu flavors—in one no-bake masterpiece. Whether you’re hosting a dinner party or simply craving a decadent treat, this tiramisu cheesecake delivers every time. With its rich layers of coffee-soaked ladyfingers, velvety mascarpone filling, and dusting of cocoa, it’s a showstopper that’s surprisingly easy to make.
For more dessert inspiration, check out our creamy cake recipe or Greek yogurt cake. If you love Italian flavors, our vegetarian Italian soup pairs beautifully with this dessert. And for another crowd-pleasing sweet, don’t miss our pomegranate shortbread.
So why wait? Whip up this tiramisu cheesecake today and impress everyone with your baking skills—no oven required!
Frequently Asked Questions
Can I make tiramisu cheesecake ahead of time?
Yes! This dessert actually tastes better when made a day in advance, allowing the flavors to meld. Store it covered in the refrigerator.
What’s the best coffee to use for tiramisu cheesecake?
Use freshly brewed espresso or strong dark roast coffee for the most authentic flavor. Instant coffee works in a pinch but won’t deliver the same depth.
How long does tiramisu cheesecake last in the fridge?
Properly stored in an airtight container, it stays fresh for 3-4 days. The texture may soften slightly after day 2.
Can I freeze tiramisu cheesecake?
While possible, freezing may alter the creamy texture. If freezing, wrap tightly and consume within 1 month for best quality.
Is there an alcohol-free version of tiramisu cheesecake?
Absolutely! Simply omit the liqueur and increase the vanilla extract slightly. The coffee flavor will still shine through.
What’s the best way to slice tiramisu cheesecake cleanly?
Dip your knife in hot water and wipe dry between each cut. This creates picture-perfect slices every time.


